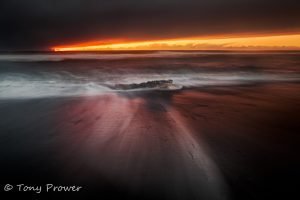
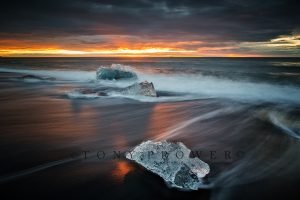
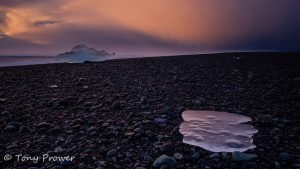
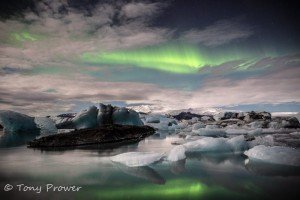
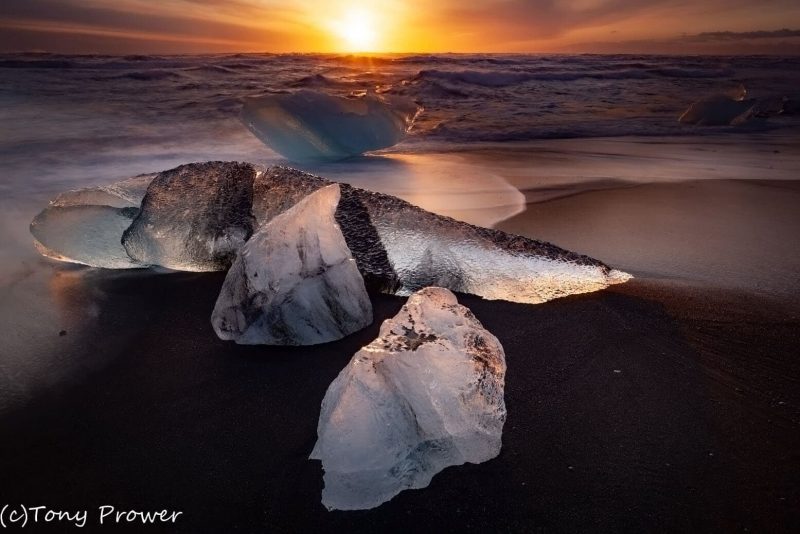
Diamond Ice Beach
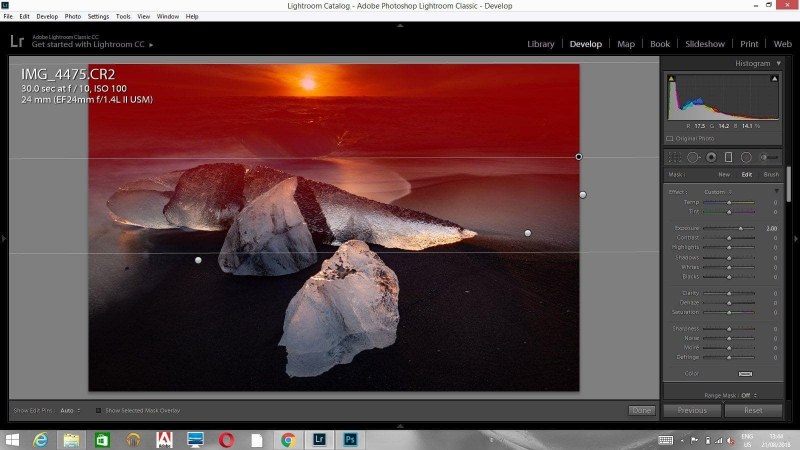
This shot was taken on the ice beach in December 2011 on a Jokulsarlon Photo Tour. The ice on the beach was quite large and the smaller chunk in the image is about the size of a motorbike engine. There was a beautiful sky all morning and the time-lapse footage can be seen in this video (at around 1.40).
I would have liked a better arrangement of ice when the sun rose. The long cone was very beautiful and I managed to get some shots of it while the sky was colourful, but as the sun entered the scene, the smaller poorly textured pieces drifted in front of the blue cone. Overall though, I think the composition works well with so many textures crowding that left side of the frame.
Small Group Ice Caving
Magic Cloth
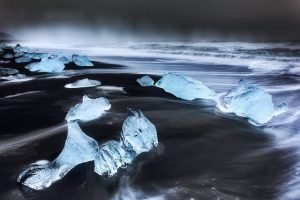
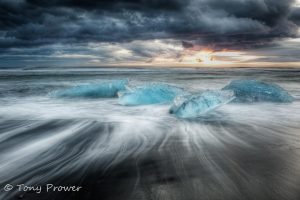
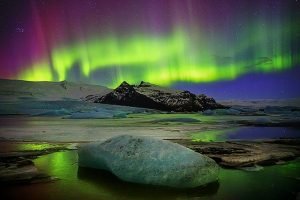
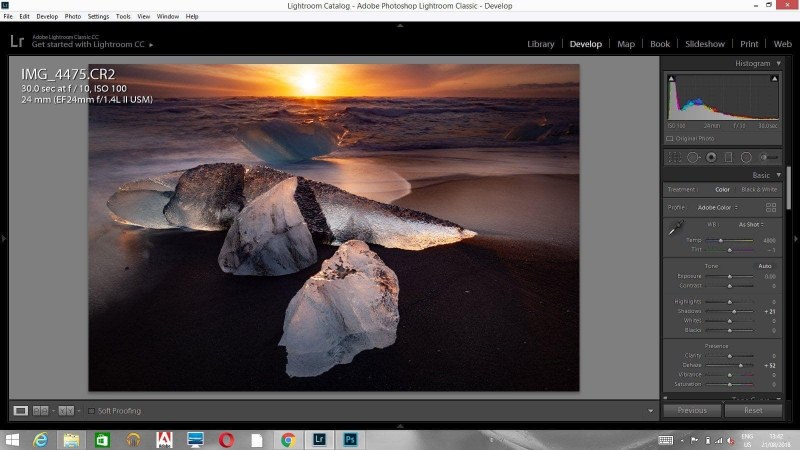
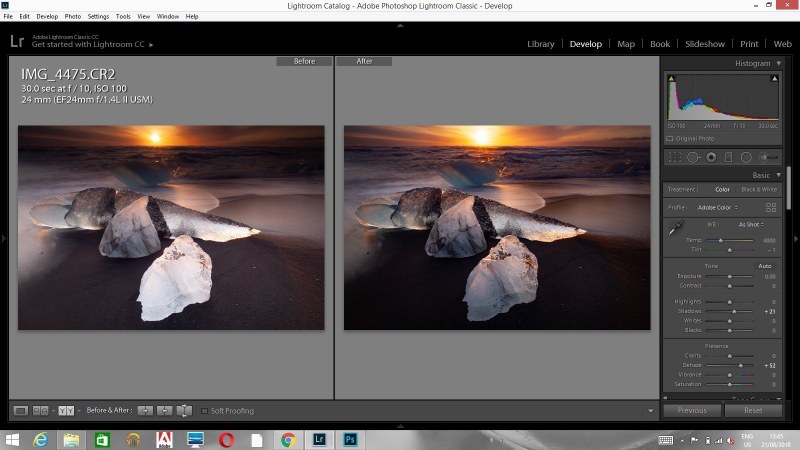
In order to ensure I exposed the highlights around the sunrise, I was very quick to cover the sky with the Magic cloth. Over the 30 second long exposure, I could have exposed the sky just 1 or 2 seconds. The remaining time would have been spend dodging the corners and giving extra exposure to the foreground ice. With retrospect, I can see that the exposure was too long and the ratio of sky to foreground looks like a 10 stop grad. It is not the sort of image I want to present without some post processing.
Lightroom graduated filter
Luckily, all is not lost… far from it! The under-exposed sky can be brightened. Although the brightening will degrade the image slightly, it is a part of the photograph without detail, so a reasonable amount of noise reduction can deal with and degradation of pixels. The work is all done in Adobe Lightroom with the graduated filters.
The foreground has the opposite adjustment because it has been over exposed. I am using a filter that reduces the exposure, but also reduces the highlights to see if I can restore the details in the bright foreground ice.
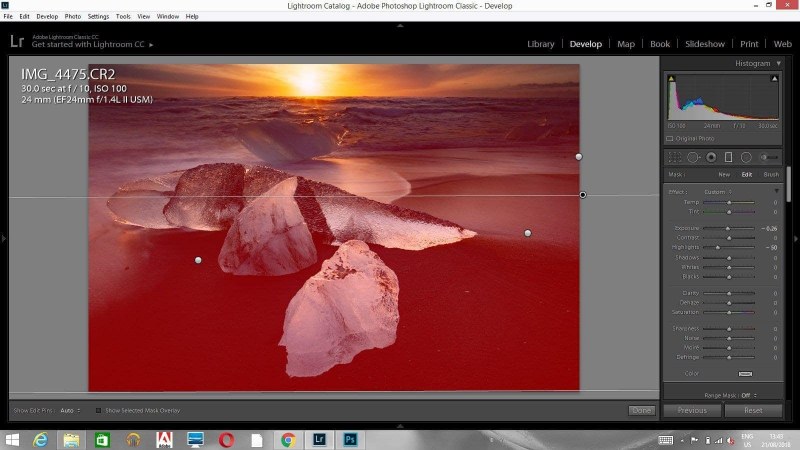
I apply the same filters to the corners, almost the same movement as when I used the Magic Cloth.
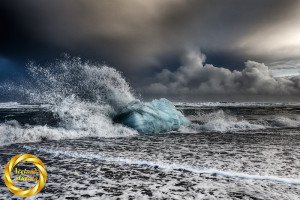
De-haze adjustment
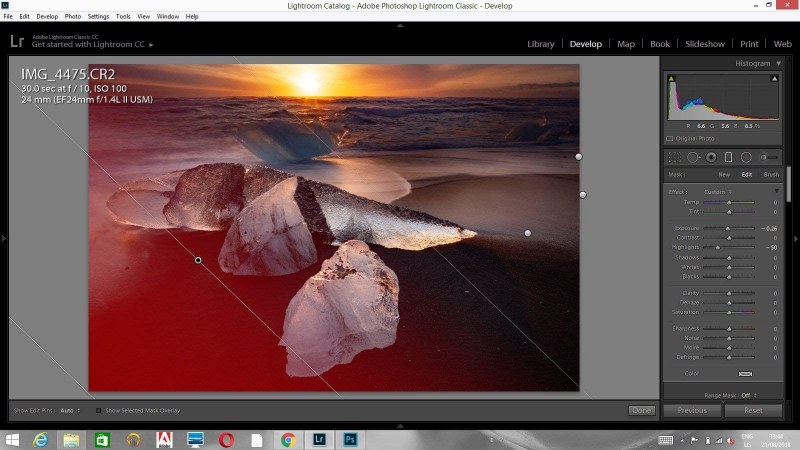
One of the things I love to do with recent Lightroom versions is to play with low contrast adjustments and introducing de-haze. This is powerful and can really give a photograph some punch, but I always find it necessary to increase the shadows over-all before applying de-haze.
The result
So after all the balancing adjustment with Lightroom’s graduated filter, I was able to apply a generous helping of De-haze which has added a punchy contrast to the ice chunks and dramatized the sky.
Lightroom Before & After
My Gear
- Canon EOS 5D Mark II
- EF24mm f/1.4L II USM
- ƒ/10.0
- 24.0 mm
- 30sec
- iso100
Canon 5D – full frame |
Canon EF 24mm f/1.4 l |
Gitzo Carbon Fiber Tripod |
B+W 77mm SC 106 ND |