Camera shooting modes
Moving away from automatic.
Automatic mode can be very useful for learning the basics, such as composition, and just getting a feel for your camera. If you want to use your camera with more control, it is important to explore other camera modes. Using manual mode or the semi-automatic modes helps justify your new purchase, whether it is a DSLR, bridge camera, or modern mirrorless camera.
I would like to go beyond the automatic mode. Should I shoot only in manual mode though? When should I use the “Semi-automatic (priority)” modes?
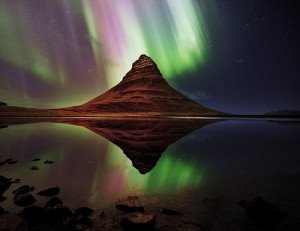
Tours Around Iceland
Exposure Modes
Camera shooting modes are ways of calculating exposure. It is important to realize that “manual mode” refers to an exposure mode and shouldn’t be confused with manual focus. Manual mode means that the photographer controls all aspects of exposure, i.e how dark or bright the photograph becomes. The semi-automatic modes are sometimes called priority modes.
Exposure triangle
The exposure triangle is a useful way to understand how three controls determine an exposure. The three controls are:
Aperture
Lens Aperture is an adjustable hole between the camera and lens glass designed to enlarge or shrink, like the pupil of the eye. Aperture controls the Depth of Field (range of sharpness) in a photo. A large aperture will allow more light to enter the camera.
Shutter speed
The shutter protects the sensor from light when you are not taking pictures. When you take a picture, the shutter opens to let light into the camera. A fast shutter will allow less light to enter the camera. Creative shutter speed can communicate movement, or freeze action.
ISO
In modern DSLRs, ISO is a sensor brightness control. A sensitive sensor (high ISO) will record light faster. It is only with modern cameras that we have been able to control this part of the exposure between shots.
.
(For the sake of this article, ISO will be a background control and we will mostly consider the relationship between Shutter speed and Aperture.)
Camera controls
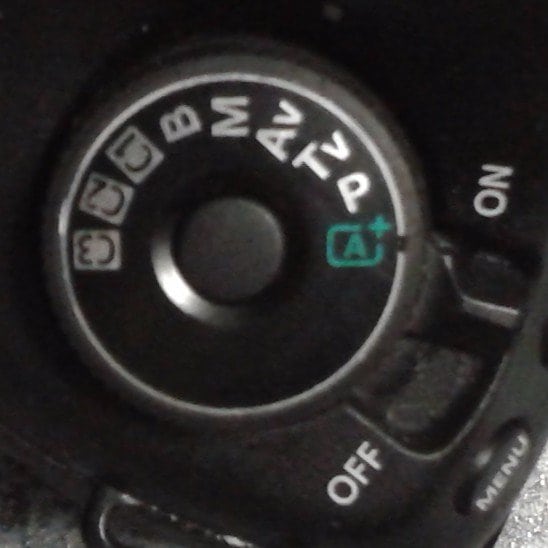
Camera shooting modes are usually changed easily with one of the main dials on the top of the camera body. The shooting modes that are usually available are: automatic mode, manual mode, aperture priority, shutter priority, and Bulb mode.
- Automatic Mode (“A” Canon, “Auto” Nikon) This mode is like point-and-shoot on a compact or iPhone camera. The camera will calculate the exposure completely, leaving the photographer to merely press the shutter button.
- Manual mode (“M” Canon, “M” Nikon) In this mode, the photographer has control of both aperture and shutter speed and has to adjust both of these to get the correct exposure.
- Aperture priority (“AV” Canon, “A” Nikon) This mode puts the photographer in control of the aperture and will calculate the correct exposure based on the choice of aperture.
- Shutter Priority (“TV” Canon, “S” Nikon) This mode allows the photographer to choose a preferred shutter speed and will calculate the correct exposure based on the choice of shutter speed.
- Bulb Mode (“B” High-end Canon, “M” Canon & Nikon) This is an extension of manual mode that allows the shutter to be held open for long periods of time. For example, 5 minute exposures when manual mode will only allow up to 30 seconds. Accessories are normally required to use bulb mode, such as a cable release or infrared remote. In the old days, the accessory was a rubber bulb.
When to use which mode?
Manual mode
In manual mode you will compose your shot and look at the light levels. Then adjust the aperture value and shutter speed until the light meter says it is fine. Some practice with manual mode is useful to teach yourself the relationship between Aperture and Shutter speed. The benefits of this mode is that you can have complete control over both and you could end up with better exposures than if you were using a semi-automatic mode. It allows the photographer to consider over or under exposure on a shot by shot basis. Doing this will give you better exposures, although it could be trial and error for a while.
But, you have to be twisting 2 controls with almost every shot. Often you will look through the view finder and the exposure is so wrong that you can be turning dials for 20 seconds before you are close. This could result in missed shots.
Bulb Mode
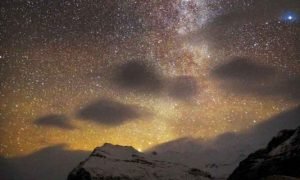
Bulb mode is an extension of Manual mode and should be used for longer exposures than the camera control will allow. Bulb mode is for night photography or long exposures with a strong dark filter (Big-stopper)
Aperture priority
In this mode the photographer will decide the aperture. Aperture controls the Depth of field (DOF). In other words the range of sharpness. In a landscape photograph, the photographer might want all objects to be in focus from the foreground to the background. In this case a small f/16 aperture is chosen and when the photographer points the camera at the scene, the camera will adjust the shutter speed to calculate the correct exposure. A portrait photographer might want a shallow DOF where only the face is in focus, or a wildlife photographer only wants the bird in focus. In this case, they choose a large aperture f/2.8. The camera will calculate the exposure for every shot even when the light suddenly changes. But, in landscape photography with small apertures, often the shutter speed can become slow without the photographer noticing. This could result in soft images or even worse shaky shots. The best solution is a tripod when the aperture truly is the priority.
- Sturdy Tripod – essential for long exposure work. I recommend Really Right Stuff or GITZO
Tripods and Aperture priority are a match made in heaven because you don’t have to worry too much about the shutter speed. If you don’t have a tripod, you can adjust the ISO, but you have to know that the shutter speeds have become unfavourable.
Shutter Priority
When the shutter speed is important, TV (Time Value) mode is a useful tool. If you are shooting sports action and you want to freeze the moment, you might choose a fast shutter like 500th second. The camera will adjust the aperture to get the right exposure. For sea-scapes or waterfalls you could use Shutter priority to get consistent water blur. With a tripod, some waterfalls look great at 15th second, some look great at quarter second. Once you have established a correct speed, you can use shutter priority and have the freedom to move a round trying new compositions while the camera does the calculations. Shutter priority is probably best for walking around shooting hand-held shots. The best tip for hand-held shutter speed is to double your lens focal length to use as the shutter value. For example, if you are walking around shooting birds with a 200mm lens, simple put a 400th second value and shoot shutter priority.
But like its counterpart priority mode, Shutter priority could give you undesirable apertures without you noticing. Another common problem with shutter priority is reported by people shooting indoor sports such as basketball. Photographers set up a fast shutter only to miss shots when there is not enough light. Sometimes shooting f/2.8 in Aperture priority is a better setting, although some of the shots will be a little blurred due to a slower shutter, none of the shots will be missed.
Exposure Compensation
In the priority modes it is essential to grasp the concept of “Exposure Compensation” this is a +/- button on your camera. Compensation is another exposure concept. This allows you to over or underexpose as desired. For example a snow scene would need +1.3 compensation, a Sunset scene might look better with -1 compensation. You can keep the compensation setting the same for all your shots in the semi-automatic modes. Using the semi-automatic modes with compensation allows you to get more accurate exposures and therefore results as good as manual mode. Exposure Compensation wont work in Manual Mode (unless you have Auto-iso turned on (but then it’s not really Manual mode)).
Conclusion
This is mostly my opinion and there is probably no right or wrong answer about which modes you should be shooting in. My feeling is that shooting in the semi-automatic camera modes are preferable because camera control is only one aspect of photography. When you are out taking photos, you should be looking and composing over and above turning dials and watching a meter. Camera control is undoubtedly a good skill for a photographer, but not as great as looking and composing. Sometimes, too many calculations and adjustment can get in the way of feeling a scene.
That said, I don’t think you should use the semi-automatic modes without practising in manual mode first. Even if you are making mistakes. It’s important to feel the relationship between Aperture and Shutter speed. .. and ISO. Don’t go into Aperture priority without being Mindful of shutter speed. Don’t go into Shutter priority without being Mindful of Aperture. Always be mindful of “Compensation” in these 2 modes. Remember you can change ISO if things are not working out as you hoped.
1. Semi-automatic modes should be seriously considered for taking photos instead of manual controls.
2. Looking and composing is more important than controlling the camera.
3. Manual modes should be practised to understand relationship between Aperture and Shutter speed.
4. Be mindful of Compensation and ISO when using Aperture and Shutter priority.


