Luminosity Masks
Luminosity masking is such a powerful editing technique. In this tutorial I have simplified the technique and given some creative examples.
Typically, we would use a luminosity mask with an adjustment layer such as “Curves” this allows us to control the contrast locally. A whole bunch of masks and layers can give us total control. Here we look at using just a few layers with different blending modes to get creative, it is the luminosity mask which will allow us to use blending combinations which we wouldn’t normally use together. I also feel that this is a nice gentle introduction to the concept of luminosity masking for the beginner.
We will be working with 2 blending modes mainly; “soft light” and “multiply”.
Small Group Ice Caving
Procedure
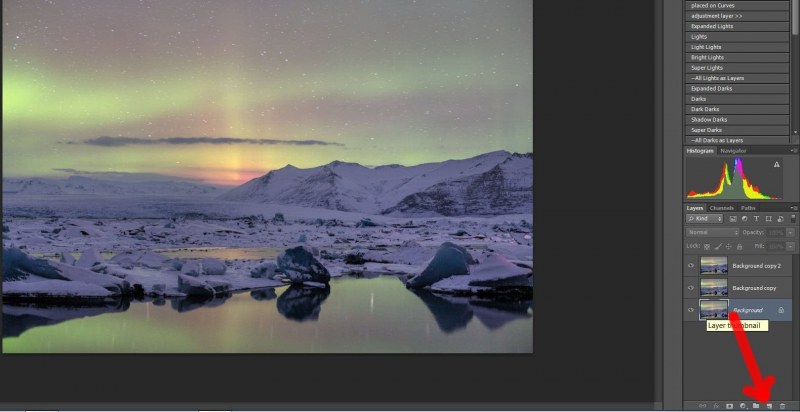
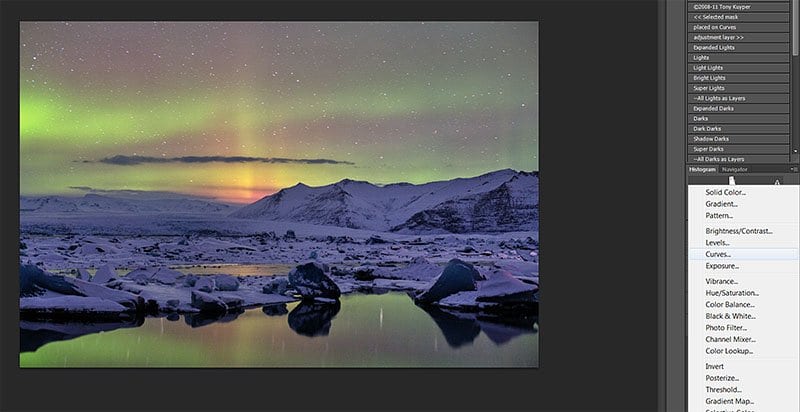
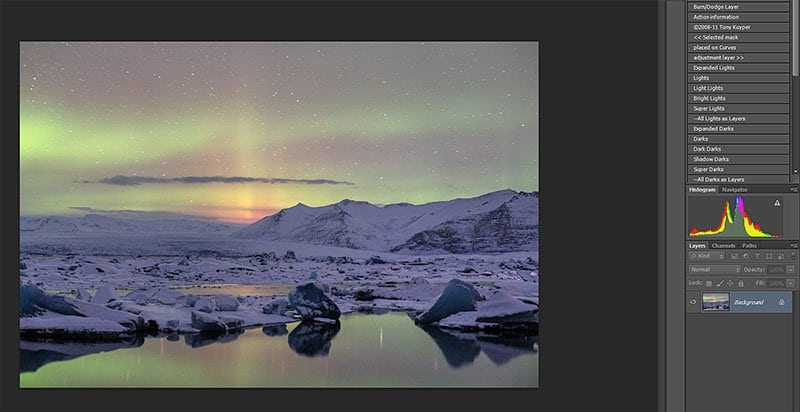
Step 1. The well exposed image is prepared in Lightroom to have a very neutral feel with low contrast and careful balance between the land and the sky. The levels of the shadow areas have been enhanced in PhotoMatix. Look at the histogram which shows how the preparation has pushed all that data into the mid range. Check the histogram again in the last images to see how the data has been re-distributed towards the “darks”
Step 2. Layer palette – drag the layer to the “New Layer” icon and repeat to duplicate the layer twice.
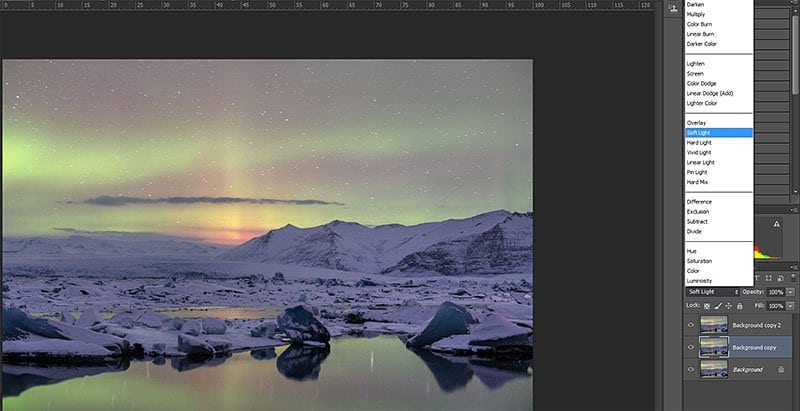
Step 3. Select the middle layer and set the blending mode to “Softlight”. This will increase the contrast of your image.
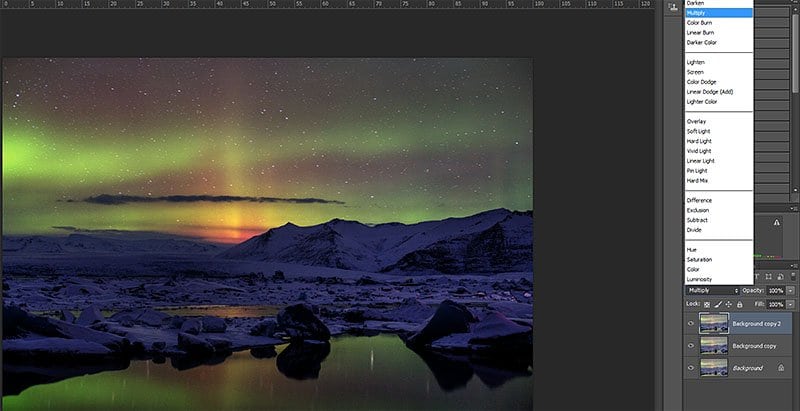
Step 4. Select the top layer and set the blending mode to “Multiply”. This will darken your image. This is a good way to see the colour potential, but often the shadows will be far too dark.

Short cuts
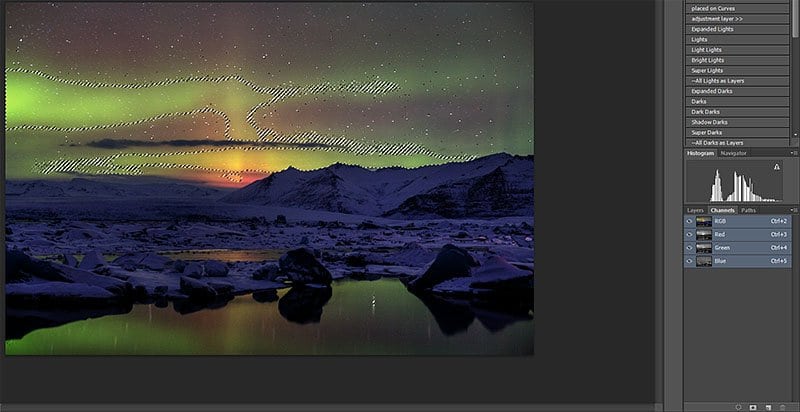
Step 5. Switch from the layer palette to the “Channels Palette”. I have made a selection based on the “Red Channel” by pressing Ctrl + Alt + 3 (you don’t have to view the “Channels Palette” to perform this keyboard shortcut selection). Try different selections to find the one which best fits your needs. (shortcuts are different on a Mac.)
- Ctrl + Alt + 2 RGB (luminosity)
- Ctrl + Alt + 3 Red
- Ctrl + Alt + 4 Green
- Ctrl + Alt + 5 Blue
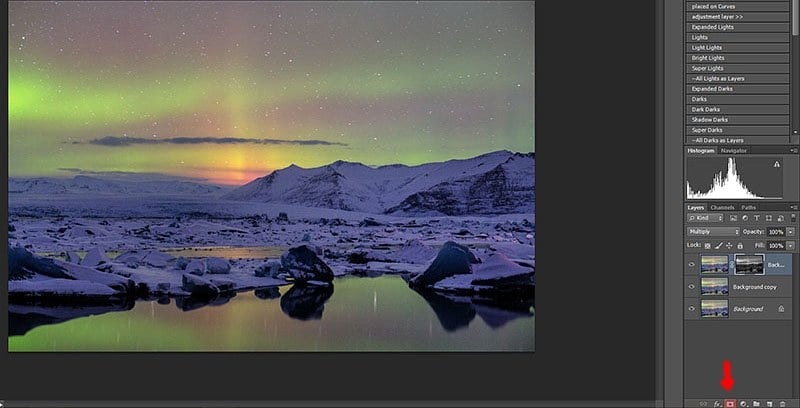
Step 6. Turn your selection into a mask by clicking the “Mask” icon. You can see how the shadow areas are now preserved by the black of the mask, whereas the highlights are still being affected by the “Multiply” mode.
2024 Calendars on Amazon
Order online!
Volcanic Iceland
Iceland Waterfalls
Iceland Aurora
Amazon International


Lost Presence
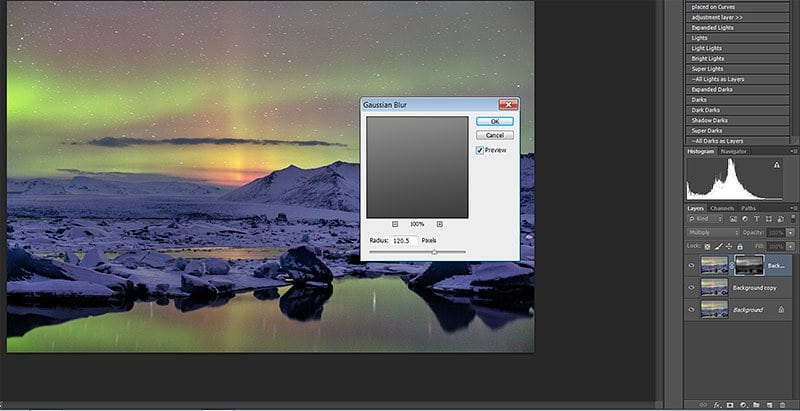
Step 7. If you notice that your image has lost some of it’s punch or presence, give the mask a Gaussian Blur until the punch returns. You should also do this if you duplicate a layer with it’s mask, i.e. to add more multiply effect.

Step 8. Duplicate your original layer and move this to the top of the pile. This will let you see the effect of the the other layers, just by turning the visibility on and off. Here, I have created a simple split screen mask to show the original on the left and the processed on the right.
Step 9. Also, I adjusted the second layer “Softlight” – by doing this, you have control of the shadow areas.