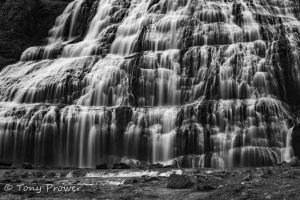
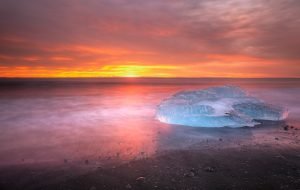
‘Black and white photography’ has a worthy place in all genres of photography including ‘Landscape Photography’. A mono image can present textures, tones and contrast dramatically. Black & White photography is maybe more dependent on composition that colour photography. Black and white film has a greater dynamic range than colour film and was utilised often by great Landscape photographers such as Ansel Adams. Ansel produced stunning landscape monos with incredible dynamic range. He pioneered the use of coloured filters and darkroom techniques to increase the dynamic range. Modern DSLRs go in favour of colour photography with incredible bit-depth and powerful RAW editors. It is easy to match Ansel’s dynamic range and produce stunning images with great depth and details.
This article discusses mono conversions as modern digital techniques for post-processing in Adobe LR and CS.
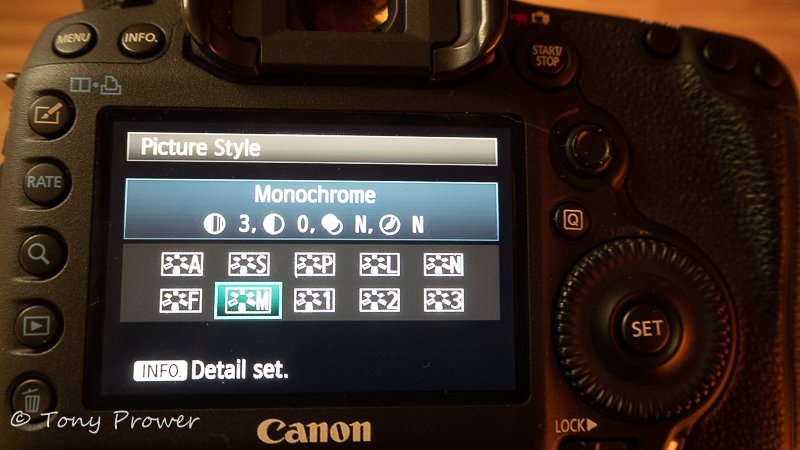
In Camera
In your white balance settings choose auto, then set the ‘picture style’ to monochrome. It is important to use RAW mode so that you can convert the picture to colour. Doing this can help you compose a scene around shape and texture without being distracted by colour. This zen-like tip simplifies the scene which can help you find lines and proportions which could be hard to spot in a full colour scene. It only works in live-view, you wont see mono through your view-finder (unless it is an electronic view-finder).
Small Group Ice Caving
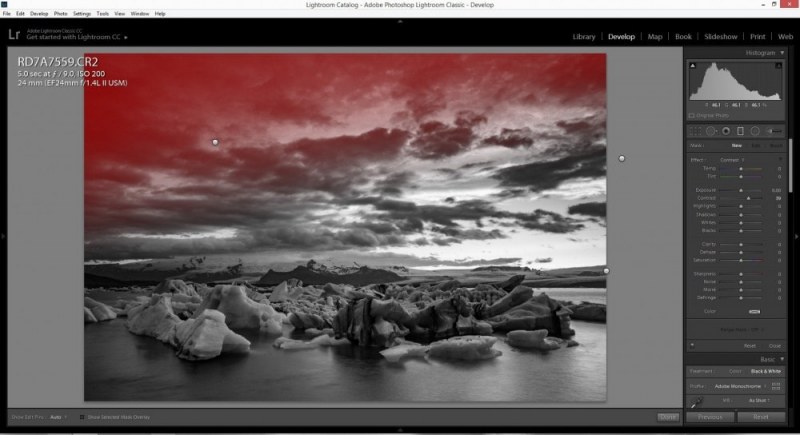
In Lightroom
I sometimes use a similar technique in Adobe Lightroom in the early stages of preparation. If you use filters or the Magic Cloth, you may want to use the Lightroom graduated filter to balance the brightness in different parts of the scene. For example, if you used a heavy filter on the sky and the unprocessed image looks unreal – like a 10-stop grad or weird HDR – then you may have to balance the scene in Lightroom. If you switch to mono mode it suddenly becomes easier to see what needs to be adjusted. It is then easy to use the Graduated filter in Lightroom with an exposure adjustment to get the perfect balance.
In Photoshop
I use lightroom more and more these days because the powerful tools can create my print-ready file in most cases. I go to photoshop if I have complex adjustments or if I want to blend layers. If you are going to blend layers, it is best to know about using layers also. See my articles on Layers and Masks.
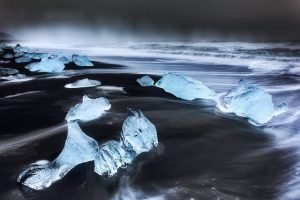
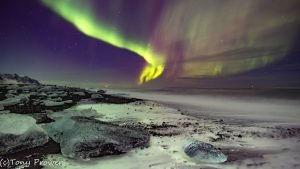
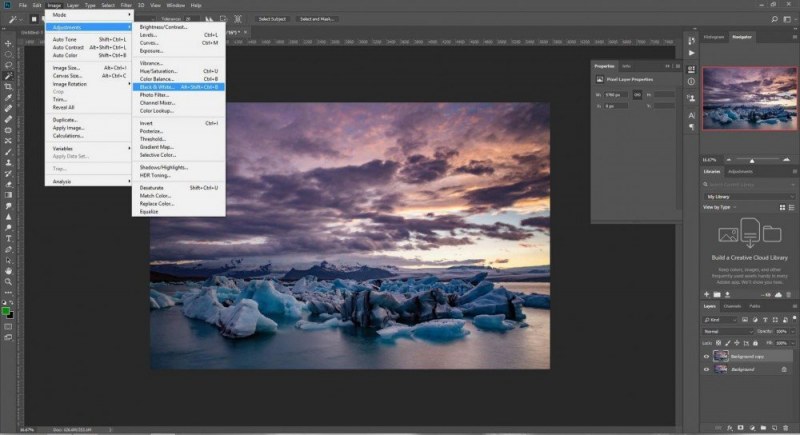
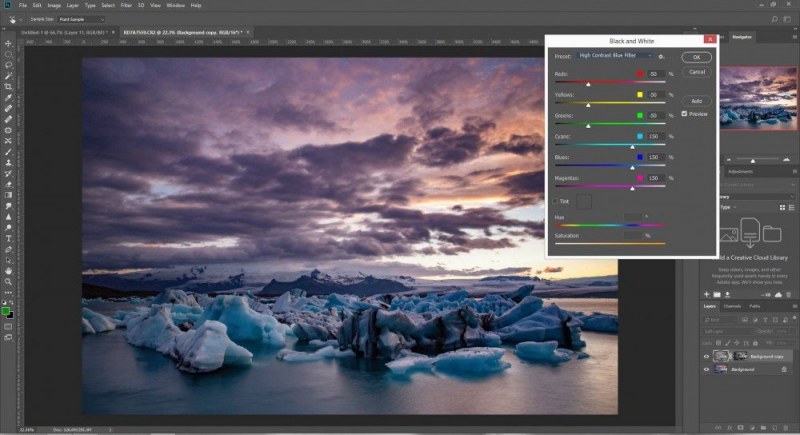
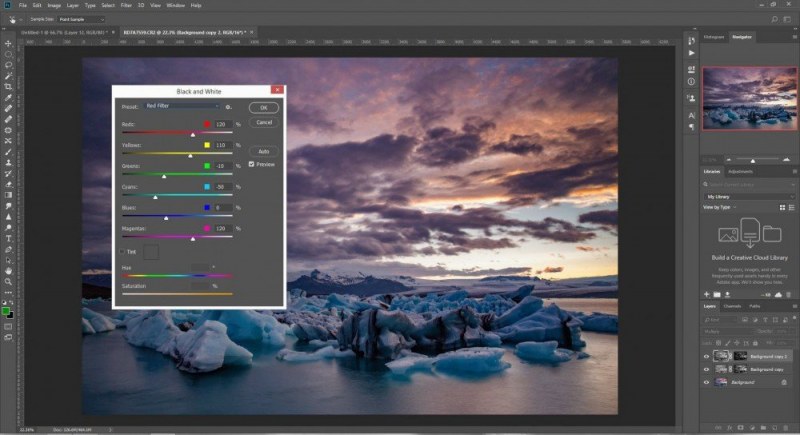
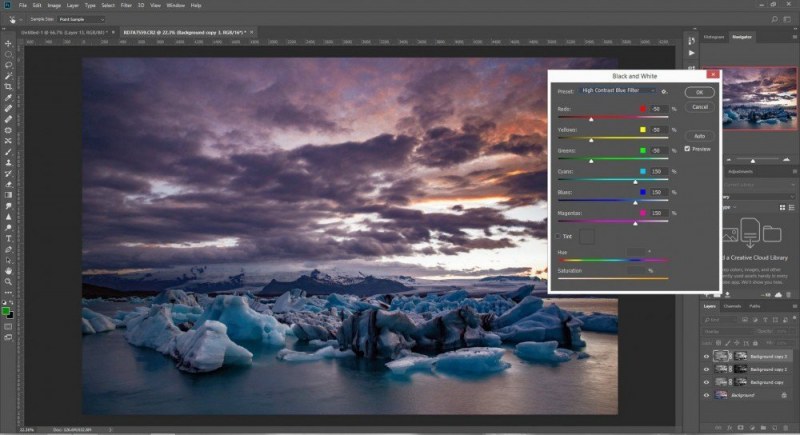
When your colour image is loaded in photoshop, begin these techniques with a duplicated layer and convert this layer to Mono. Test different mono presets. For Landscapes I usually select ‘green’ channel. For ice caves, I might use ‘High contrast Blue’. You could get similar result, by using an adjustment layer, but having a mono converted layer can give you more options and better control over complex techniques.
2024 Calendars on Amazon
Order online!
Iceland Aurora
Volcanic Iceland
Iceland Landscapes
Amazon International


True blacks and whites
This technique is to create a selection in your mono converted layer of the whitest whites and the darkest blacks. In most colour photos there should be some black and white. If your white balance settings are good then the white objects or bright lights, or snow will be really close to white. Your deepest shadows should be close to purest black, but often suffer from colour noise and can appear a bit red or green. By blending the whitest whites and the darkest blacks into your colour picture, it will help you see any colour balance issues and deal with some shadow noise and tone.
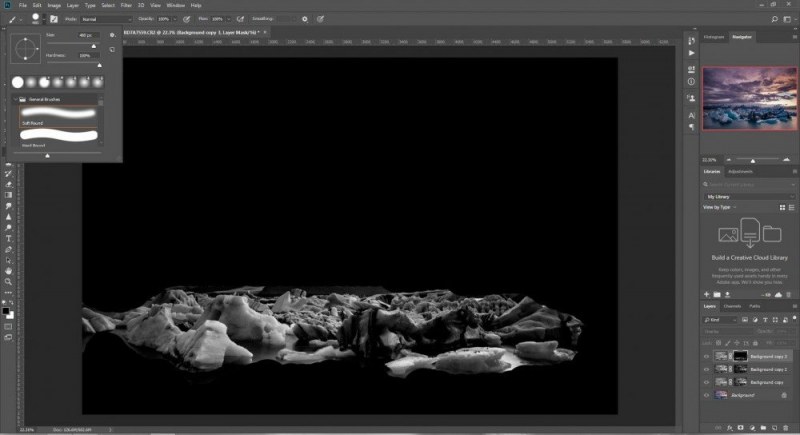
STEP 1: Use the magic wand tool to select the whitest whites. Set the range to 20-30 pixels. Use a lower number for a bright image. Use a non-contiguous setting so that it will select similar pixels in other parts of the image. You should see marching ants around some small parts of the image.
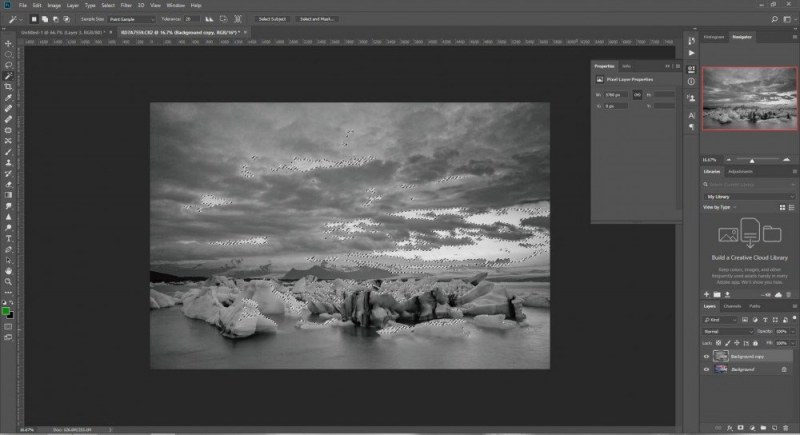
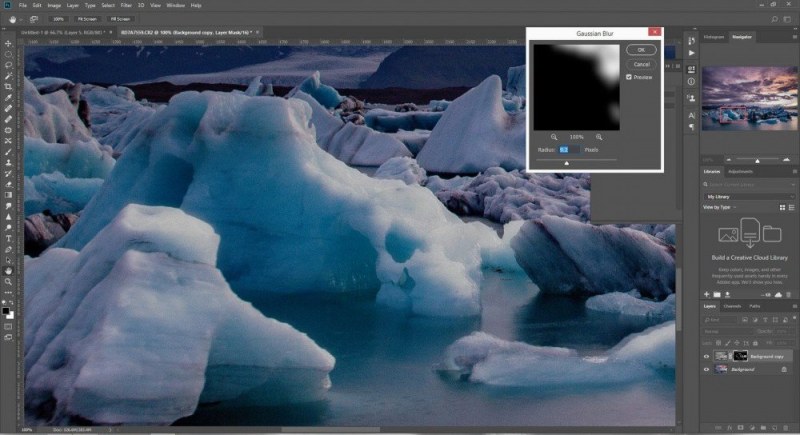
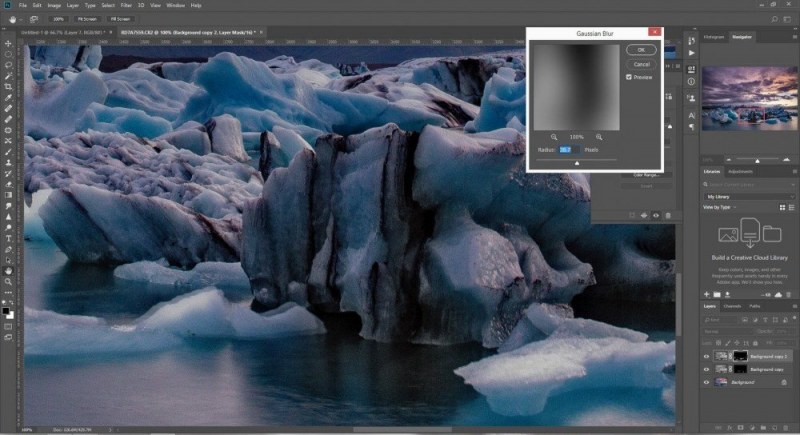
STEP 2: Click the mask icon and the whitest whites will be blended into your colour image. At this stage you will see if your image has an unwanted colour cast. If the whites have strange edges, apply some Gaussian blur to the mask until it looks normal. The blur gives the shapes on the mask a feathered edge so they blend easier.
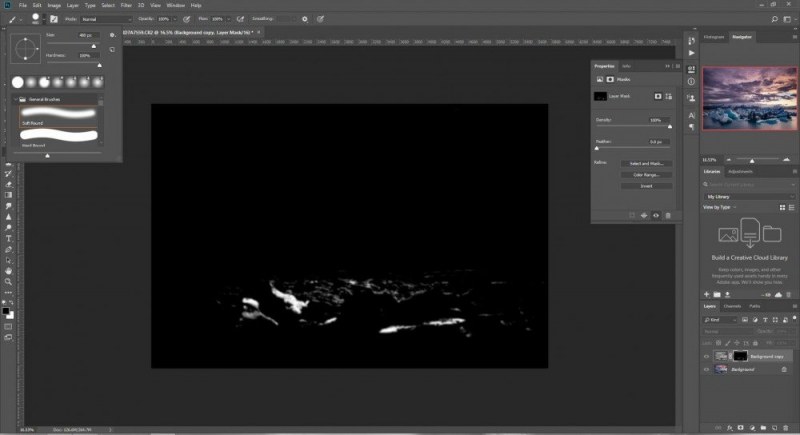
STEP 3: Duplicate the mono convert layer again and delete the mask. You are back to black and white. Now use the magic wand tool to select the darkest blacks with similar settings to STEP 1. You should see small groups of marching ants in various parts of you image.
STEP 4: Click the mask icon and the darkest blacks will be blended into your colour image. Then apply some Gaussian blur to eliminate any strange edges.
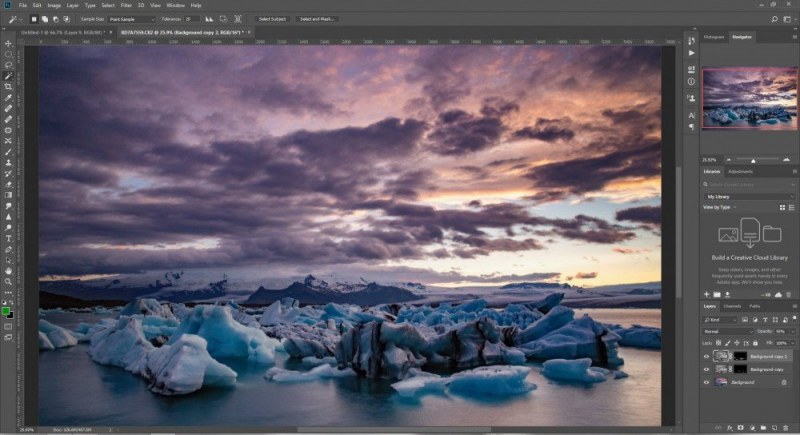
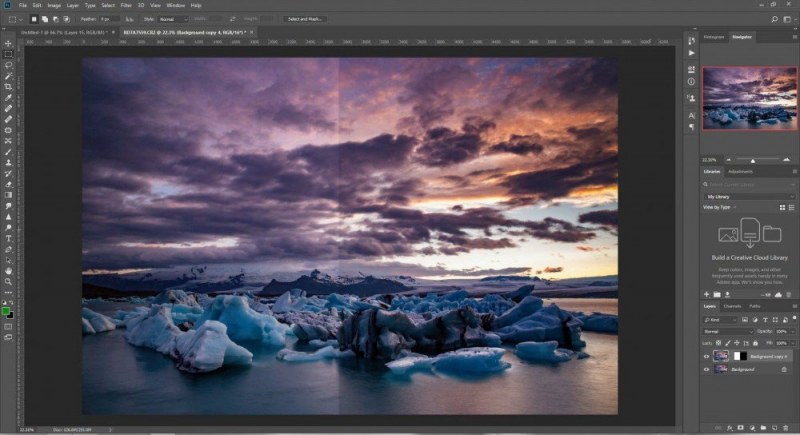
STEP 5: Blend the layers with the percent slider until the effect is desirable.
Blending modes
The previous technique can be experimental and some images will respond better than others. This next technique is even more experimental in that it involves trail and error and a little patience. The results can be unexpected and creative, so it is worth persevering if you want to enhance your photoshop skills.
STEP 1: Start with a mono converted duplicate layer. Run through different blending modes and observe the changes. The modes I use the most are Softlight, Multiply and Overlay. These modes retain the colours, but change the luminosity of the colours, for example they can lighten the blues and darken the reds, or vice versa.
STEP 2: Create a mask if you want to apply the effect to different parts of the image. Create more duplicate layers with different mono conversion presets if you notice that the green preset represents the landscape well, but the blue preset has a better effect on the sky.
In the figure above, I am blending the layer and using a luminosity mask before I convert the layer to black and white. This is so I can choose the best mono conversion channel for this mode and for the highlights. To create a luminosity mask, press Ctrl+Alt+2 (or ‘3’ or ‘4’) on a PC. If you create the luminosity mask after selecting the blending mode you can fine tune the selection. For example creating a luminosity mask in Multiply Mode with select the brighter highlights only.
STEP 3: Blend the layers with the percent slider until the effect is desirable.
Conclusion
If you are crazy for colour photography it can be crazy to leave the world of mono out in the cold. Using a mono live view to compose, could be your turning point as you work to improve your composition. By converting to mono in post-processing you can create images with better light balance and have control over colour casts and contrast in your final colour image.