Time to sell
After spending some years taking photos, I decided it was time to try and sell them as art. Recent health alarms have taught me that I am not going to be able to go out and take photos at the rate I have been, so maybe it is time to take that terrifying step of finding out if all the work I have produced over the last couple of years is worth anything. To do this I have been working towards a small exhibition at the Brick Lane Gallery – 9th – 21st June 2015. All images are unpublished Limited Edition Prints. This blog post will document my preparations in all aspects of creating an exhibition.
This has been my adage:
The art of photography is full of compromise, but the presentation of your art deserves absolutely no compromise.
Urban vs Rural Landscape exhibition
June 2015
The Brick Lane Gallery, London.
Compromise
Every photograph involves a compromise of some sort. We compromise the freedom of movement for the security of a tripod, we compromise iso for DOF, we compromise aperture for shutter speed. We compromise compositions for focal length, we compromise exposure for dynamic range. Before I get too Moany-Tony, I just want to convey the idea that out in the field and in the practice of photography, success comes with the ability to compromise, to be able to make the decision to adjust iso to achieve a better DOF, or to use a filter so that a nicer aperture can be used.
The life of a photographer involves compromises also. A lot of traveling involves a lot of driving, and/ or sitting, a lot of image processing and blog writing involves a lot of sitting. Is there any wonder that the average photographer is overweight at middle age. Years of standing out in freezing conditions also take their toll, usually an extremity, we always find out too late. The best job in the world can become a nightmare!! Moan – bloody moan!!
The decision to exhibit in a gallery is brave. The costs of doing this overseas are huge. I have to be ruthless, I have to be sure that the images are absolutely worth exhibiting, which means that 100% confidence in my work is essential.
Finding a gallery
You can include your work in a London Gallery if they like your work and want to earn a commission from sales, or you rent the space yourself and keep profits. In London, galleries rent out around 3000 GBP per week. Combined with the cost of producing enough images to fill a gallery and the shipping, framing and hanging, this option is too prohibitive for someone who is only just beginning to display their work. At the other end of the rental option are the photo fairs, where space is cheap, and so are prices. I kept searching until I found the Brick Lane Gallery, London. They run regular exhibition of painting and photography, including landscapes. During these exhibitions, they rent space to the artist in blocks of 3 meters over the 2 week exhibition period. An artist can have up to 9M. The price is reasonable, the shop is set up as a gallery with proper spaces and lighting. As a bonus, they also hang all your pictures and sell them for you (all part of the service). As an artist from overseas, this company became my top choice. Working from Iceland, I wanted to find 3 overseas printing companies (for comparison, but also to find a company for a long term relationship), prints are shipped to me in Iceland, so that I can sign and number them. Then I ship them to a framing company very close to the gallery, so they can frame and deliver the complete works of art.
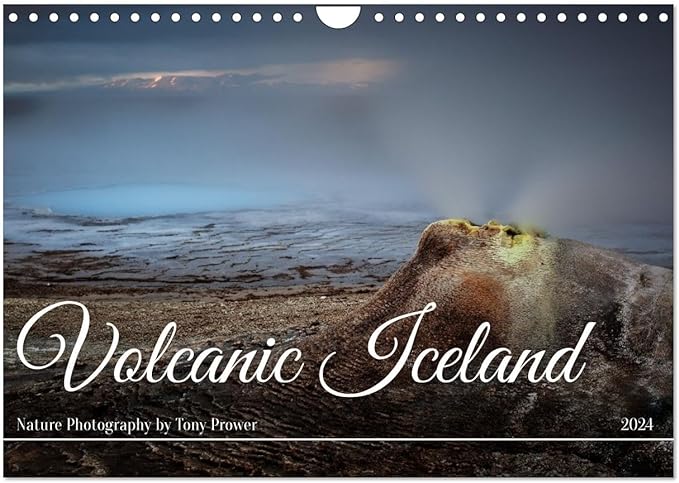
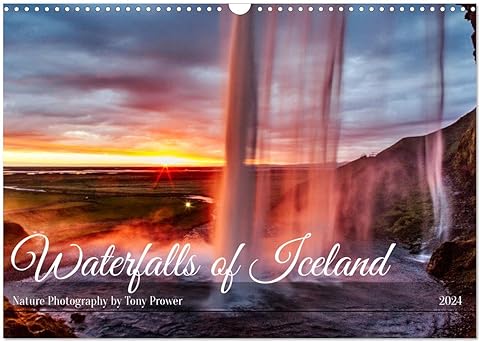
2024 Calendars on Amazon
Order online!
Volcanic Iceland
Iceland Waterfalls
Iceland Aurora
Amazon International


Costing
Aaaargh! I have just seen my bank account lose a whole bunch of numbers, this is a scary ride!! How did I get here? (oh yeah: “No Compromise”) So I calculated how many images of various sizes could fit comfortably into a 6M or 9M space. Then I researched fine art print prices and got some quotes from various framers who are local to the gallery. In general terms, I found that filling a 3M space was about the same price as renting the space. In accordance with my adage, I had to rent as much space as I could afford. Other costs included shipping, test printing, our flights, hotels etc.
Choosing images
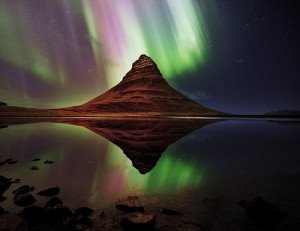
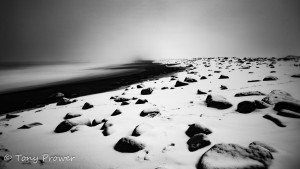
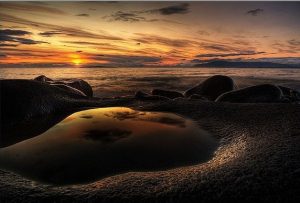
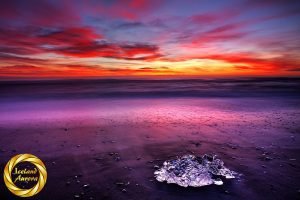
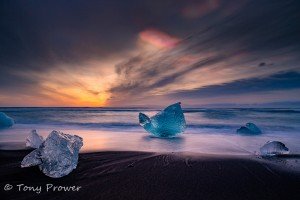
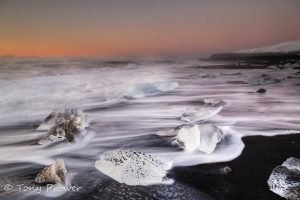
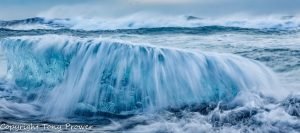
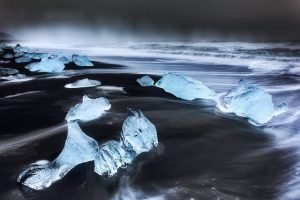
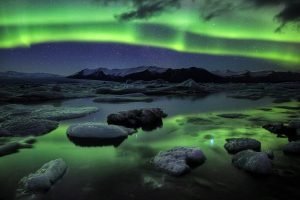
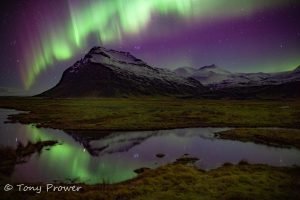
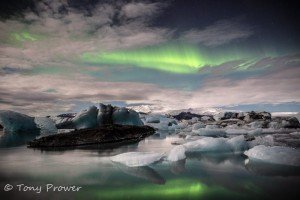
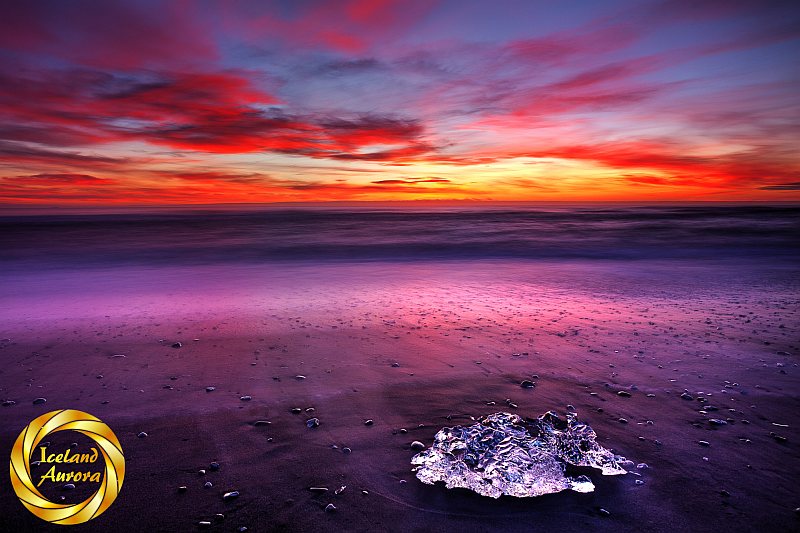
So here is the challenge, I wanted to shoot the images after booking the space. Because I wanted fresh, unseen images. I know that if I went through my archives looking for unprocessed masterpieces, I would be seriously compromising the quality of the exhibition. I had some tours and workshops to shoot on over February and March, so I took my exhibition images when I wasn’t assisting or teaching. One piece of advice for choosing exhibition photos is to have a theme. Several high quality aurora photos became instant contenders following an evening of stunning night photography with Peter Gordon. After instructing the workshop on exposure and focus, I went off on my own for 20 minutes hunting reflections. I was disappointed at the time because the only reflections which were working were vertical compositions. This exhibition is a great chance to display some large vertical shots, so it is actually these vertical shots which will take center stage. But I didn’t want it to be an Aurora Exhibition, so I decided to include several “Ice” studies from the black beach. The common theme is Magnetic Forces, auroras, tides, gravity etc.
So after having a bunch of images to choose from, I was faced with the humbling task of assessing their Large Print worthiness. In general terms, this means that every part of your image needs to look great at 100%. Achieving this all comes back to the moment you take the shot, having the right focus and sharpness, being exposed properly so that it doesn’t become noisy in post processing, and of course having the right composition, so there is no cropping or straightening required (this will all affect the over-all print quality – especially if you go large).
Creating the display
The next stage in the choosing images is to see how they fit together as a group of images to create a solid display. To do this, I created a scale model to represent a 9M wall and cut shapes from Christmas cards to represent images and frames.
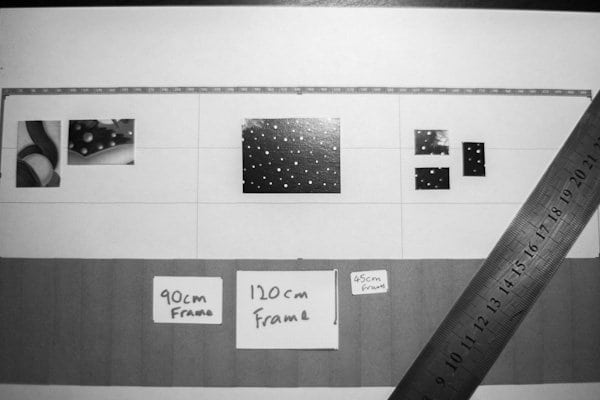
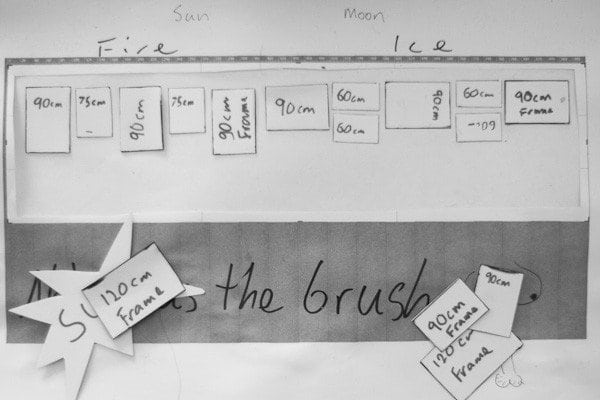
This was so useful to give me a physical, visual reference, I played with several sizes both Vertical and Horizontal to see how many images I could comfortably place on the wall. Remember: “No Compromise”, every image had to have its own space. I want the viewer to be able to enjoy a single image without being distracted by its neigbour. On my model gallery wall, I had lines to mark each 3M mark. Below was my final decision on a 9M wall.
Then the Gallery told me that my space was a 6M wall and a 3M adjacent wall. I was lucky, I had created a model, all I had to do was to divide my model into 6M and 3M walls. After a total re-arrangement, I was left with this display for 3M and 6M walls.
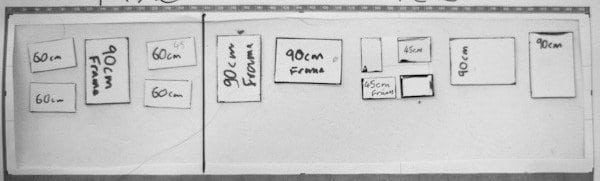
Image preparation
After my images had been selected and the sizes established, it was time to prepare the images for the printers. My images went through the same processing techniques as I do for flickr or other online use. The main difference is to be checking details and noise at 100%.
On many fine art print websites they offer an ICC profile for their printer and paper combination. This is a colour profile and it is important to check if their printers are able to print the colours you are sending them. After downloading an ICC, you have to place it in your windows files so that Photoshop is able to load the profile. Once a colour profile is simulated, it is possible to check for Gamut warnings – colours that wont print correctly.
Almost all printers have different requirements, some want re-sized Jpegs, some want 8 bit Tiffs, some don’t supply a colour profile, some offer several – depending on the paper you select. I ended up creating a file for each different printer and having files with each printer’s requirements. Resized images are named as such.
Logistics
The final part of the image preparation (before they get to the Gallery) is the framing. It turns out that many of my images are now Liquid Acrylic mounted and therefore don’t need framing. The 4 that do need a frames are being sent to a framer who is located just a few hundred yards from the gallery. They will personally deliver my work after framing. I prefer this to having someone who is not involved in the art to be handling my work. The acrylic prints will be delivered directly to the Gallery by courier. The acrylic prints were printed in Dublin.
Artist Statement:
Technical Details
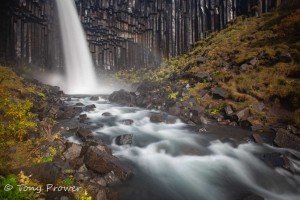
This unpublished and exclusive collection of Limited Edition Prints was captured with the Magic Cloth technique, a technique pioneered by Tony Prower for digital photography. The use of this technique means that each image is uniquely hand-crafted in the camera at the location as different parts of the scene are exposed for a different duration over a long exposure.
Concept of the work
Mögnuð Jörð (magnificent Earth)
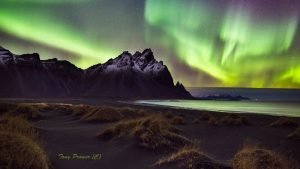
In Icelandic, the word for “Magnificent” also refers to “Magnetisism”. Huge magnetic forces sculpt the ice, conduct the Auroras, and direct the waves. These long exposures record an accumulated effect of these forces. The location for these images in South East Iceland allow these subjects to converge. The hope is for the viewer to feel the huge magnetic forces which govern our planet as we hurtle around our sun.
The images can soon be seen in the Justnanco Gallery in Bristol.!!