Depth of Field
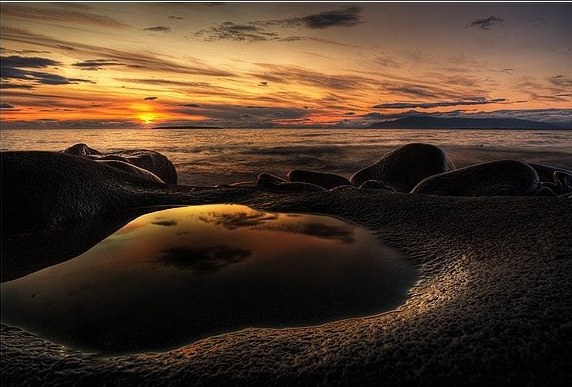
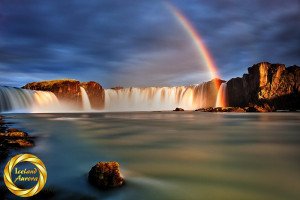
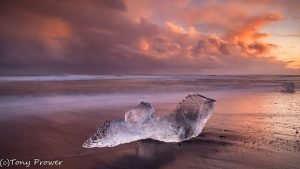
This articles looks at a lengthy and complicated procedure to render every part of a scene with perfect focus. the aim is to achieve a high depth of field (DOF) whilst maintaining the high quality of your lens’ sweet-spot. The main challenge is, maybe, deciding what situations exactly would require this sort of treatment. This technique is popular for macro work, where the DOF is usually too shallow to capture all the sharp detail in a subject. Landscape could benefit as there is a requirement for sharpness throughout the scene. Usually an f/16 and careful hyper-focal calculations will achieve this. For my first attempt, I chose a landscape scene with a huge focal challenge. In this scene the immediate foreground is just a few inches from the front of the lens.
Even at f/22, I would not have been able to capture full sharpness in every part of the scene. Without Focus stacking, I would have attempted to get the whole of the foreground in focus and left the sky and horizon out of focus. This was also an HDR image, so we can look at a few of the original frames for analysis.
Aperture sweet spot
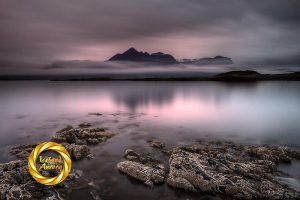
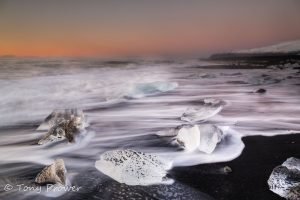
This was the first shot using f/14. Choosing your aperture carefully is important. You don’t normally need to close down to f/16 or f/22 because the technique allows you to layer the different focal plains. The choice should be around the middle aperture of your lens to get the sharpest image possible. Lens have their best quality in the middle somewhere around f/8. I had to choose f/14 for this sequence because the immediate foreground was closer than the nearest point of focus. Therefore, a smaller aperture was required to include a bit more of the immediate foreground focus. As you can see, the very bottom of the rock is still not in focus. The part of the rock which is line with the edge of the puddle has the best focus – everything else is a blur.

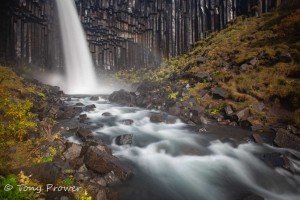
The next shot has the focus on the rocks at the back. The aim was to include the rest of the foreground rock. As you can see the immediate foreground and sky are a blur.

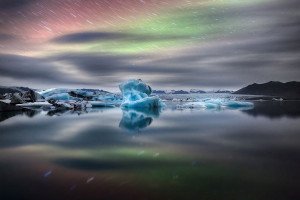
Short of infinity
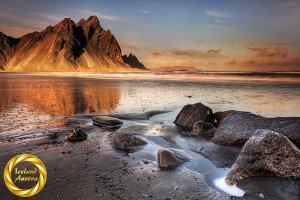
For the last shot, I focused just short of infinity. This captured the sea, horizon and sky nicely.
Ok, all shots taken and I mentioned that this was HDR so I had nine separate exposures to play with in photoshop. First I need to prepare them in my RAW processor to make sure they all have the same white-balance. then I made separate HDR images and used the same settings for each tonemapped image.
The following procedure was done on Photoshop CS3, it is possible that if you have an earlier version this might not work…
Go to FILE > SCRIPTS > LOAD FILES INTO STACK

When the dialogoue box appears make sure you check the ‘Attempt to automatically Align Source Images’ box… and then continue.

Photoshop CS4
Go to the layers palette and select all the layers (Press Ctrl and click each layer or Select=>All layers) then go to Edit=>Auto-Blend Layers. Select ‘Blend Layers with Seamless Tones and Colours’ and CS4 will automatically find the sharpest parts of each layer an create a super sharp image.
Photoshop CS3
Go to the layers palette and select all the layers (Press Ctrl and click each layer or Select=>All layers) then go to Edit=>Auto-Blend Layers.

Now we need to do some manual masking to bring out the sharpest parts of each layer.

Use plenty of trial and error and keep zooming to 100% to check your work.
The result