Introducing Landscape photography
Taking photos of landscapes is a healthy activity that connects you to nature and helps you forget negative thoughts. If your photography is good, then your viewers will benefit in the same way. Here are a few thoughts on what landscape photography is and how to develop your landscape photography skills.
I have immersed myself in landscape photography and surrounded myself with landscape photographers for several years. Hopefully my experience can help you with this landscape photography tutorial for beginners.
Small Group Ice Caving
Capturing Scenery
What words come to mind when you hear the phrase ‘Landscape photography’?
Scenery, nature, wilderness, vista, horizon, foreground, sky, natural light… Landscape photography is all about capturing the scenery presented to us in the great outdoors. But is it as simple as going outside and pressing a button? No, but you might be lucky. Landscape photography requires careful planning, plenty of travel, knowledge of weather systems, knowledge of nature, and knowledge of photography.
In this guide, I hope to communicate the importance of three main considerations: composition (framing your photo effectively), exposure (getting the right amount of light), and sharpness (getting the right focus). These are like three virtues that I practice in most of my photos. Aside from composition, exposure, and focus, the concept of ‘timing’ can be just as important in landscape photography as it can be in other types of photography.
Contents of Landscape Photos
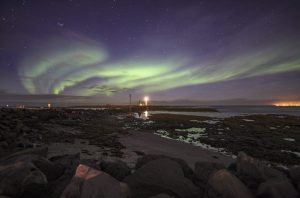
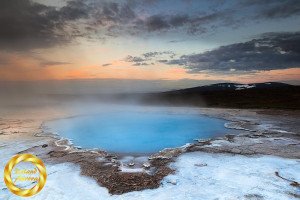
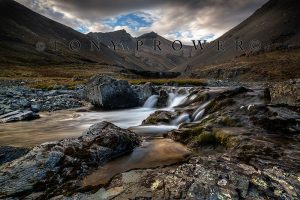
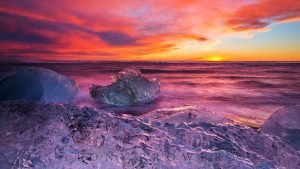
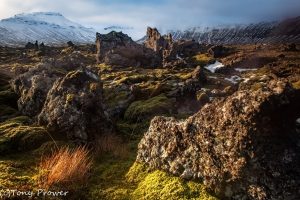
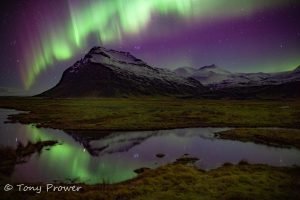
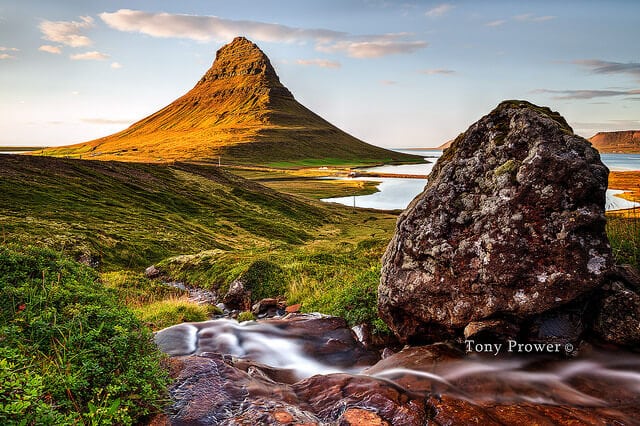
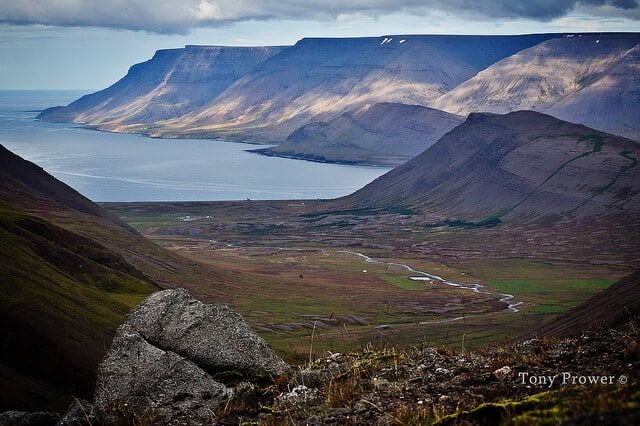
Look at the two landscape images above and see if you can spot three things in common.
They have much more than three things in common, but what I am asking about is
- visual, i.e. shape or size
- content, i.e. stones or water
- emotional, i.e.colour or depth
What can you say about these three aspects of the two photos above?
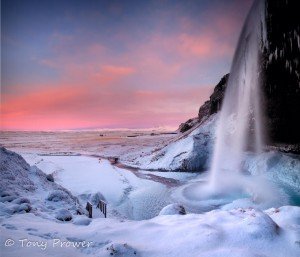
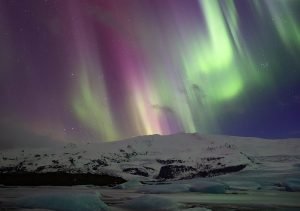
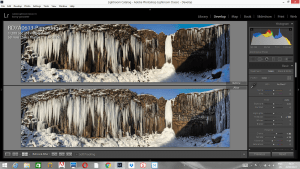
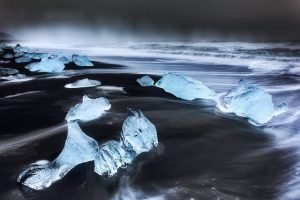
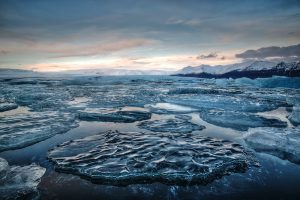
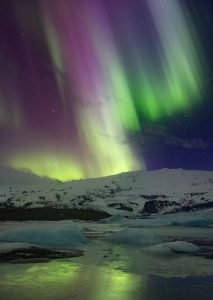
Can you still say these things about the two landscape photos below?
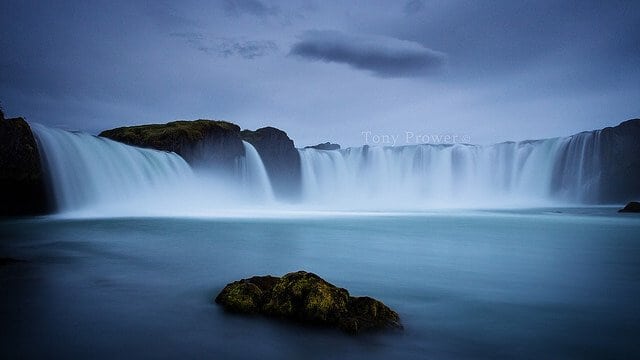
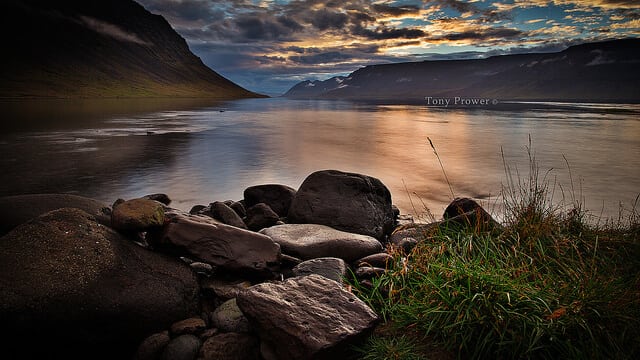
In a general sense, Landscape photographs do have many things in common.
2024 Calendars on Amazon
Order online!
Volcanic Iceland
Iceland Waterfalls
Iceland Aurora
Amazon International


Natural Landscape Elements
Despite various locations, landscape photographers will look for an interaction of elements to arrange in the scene. For me, the interaction of elements tells the story of the landscape. For example, the ocean waves hitting a rocky shoreline tell the story of erosion, show the history of rock falls, and give the viewer a sense of how natural elements move in a scene.
- Air – sounds like a silly one, but air quality indicates depth, clouds suggest air, wind suggests air.
- Water – this can make or break a landscape photograph. Water adds a higher dynamic range to the landscape and allows for reflection of objects and light. Fun with longer exposures.
- Light – usually the sun or moon, but can be auroras or milky way or fire flies. Light is responsible for colours. Although colours can be changed in post processing, they need to be there in the first place.
- Land – important for supporting your tripod. That stuff we normally walk all over is the backbone of Landscape Photography.
Landscape Photography Composition
The arrangement of these elements is important in a Landscape photograph. How much of the photo each element takes gives that element importance. Elements can be placed in different parts of a landscape photo to help the eye move around the photo more easily.
- Proportions – balancing areas, such as foreground object and the amount of sky. The Rule of Thirds is a good place to start.
- Depth – arranging elements to communicate the depth of a scene is important when you have no size reference. Guide to Mastering Depth Perception LINK.
- Lines – lines make the proportions mentioned above, we use lines to lead the eye to important areas of the scene, lines are essential in telephoto (longer than 50mm) landscape images.
Convey Emotions
It is important to convey some emotion in a landscape scene. How lost are you now? you came here because you have a new camera and now you have to capture emotion with it!! Let’s simplify emotion for Landscapes… we are talking about peace/ turbulence, bleak/vibrant. You can enhance “vibrant” with water/ice, you can capture “peaceful” with reflections etc…
Communication
It is really useful to understand photography as a form of communication. In landscape photography, the communication is the sense of being in that place at that time. Landscape photography communicates where things are in relation to the viewer. A successful landscape will leave the viewer in no doubt of the distances and depths of a scene.
Landscape Reading
There are no hard and fast rules as to what makes a pleasant vista. For me, the architype would be reaching the top of a hill and when you turn around and look at the view, it makes you say ‘Wow!’. Landscape photography isn’t always about huge vistas though. Some landscape features like waterfalls and Lava Fields don’t always require the Bigger Picture.
The skilled photographer should be able to understand the landscape and spot the visually interesting parts of the scene. Just like an archer, the photographer needs to be aware of the depth of the landscape.
With most landscape vistas it is composition of the elements which create a pleasing image. Finding vistas requires both accidents and research, or you might have followed a geotag. If you could be at the right place and always at the best time, your landscape photography could be very easy, even with a camera phone.
Timing & Weather
One of the things that I plan for the most is the time of day, I always know what time the sun will set or rise before a photo shoot. If I am shooting near the sea, I try to find out the times of high and low tide. Sometimes the tide level can dictate the type of shot you get, but it is also useful to know whether it is coming in or going out for your own safety.
If I am planning a night photography session, then I would scout the area in daylight. Ultimately, a lot of success depends on the weather.
Make Hay
Depending on what type of photograph you want, the weather can play an important role. Some photographers will wait for hours, days, weeks for the right weather conditions, but nearly all weather conditions offer something for the landscape photographer.
if you want to capture fine detail in foreground grass and flowers or unleash the power of the reflection, it is essential that you shoot on a day with no wind. On the other hand, a very windy day with a slow shutter can create an abstract effect like a Monet painting.
It is also wise to protect your digital camera from moisture, so if you are shooting in the rain, be sure to wear some protection… but don’t let it stop you from venturing out.
Personally, the only times I don’t shoot pictures are in blizzards at night… I may as well point my camera at a piece of paper for half an hour for the same result!
Sharpness in Landscape Photography
The landscape photographer traditionally attempts to get everything sharp in a scene, from the nearest pebble to the ship on the horizon… everything should be sharp. This not a hard and fast rule though. In order to get everything sharp, photographers use very small apertures etc f/16 or f/22 with a large depth of field (DOF).
Focusing becomes easier because the depth of field is large, but the lens will be far from its sharpest at these apertures. most lenses have their optimal sharpness around their middle aperture. So before you go and close right down to f/22, ask yourself if you could make the shot with f/16 or f/11.
If your camera is on a tripod at waist level or you are holding it at head level, then you do not need f/22 as the nearest object (the ground) will be a few feet away. Ask yourself if the distant object really need to be crisp sharp if they are only a few pixels across? By having a shallow depth of field (f/2.8 for example) you can really bring the focus of an object in the scene, some twilight or sunset skies look good out of focus.
The key is to try different approaches and see which results YOU prefer. If you plan to use small apertures and get everything in focus, them I would advise you to research into the concept of Hyperfocal Distance.
Photography skills
There are 3 basic skills to consider as you practice landscape photography. In many ways, taking a successful landscape photo is like completing a checklist. The checklist can be very long for advances techniques, but for the beginner, these three basic skils should be the start of your checklist.
Landscape Composition
Composition = arranging the different elements into a meaningful scene.
Landscape composition can be very simple, such as “foreground then background”, or it can get very complex such as “arranging colours for emotion” or “finding overlap for better contrast”. Ansel Adams said that great landscape photography is about knowing where to stand. You can practice this without a camera.
Composition is best practiced with a prime lens which forces you to move in 3 dimensions; up-down/near-far/left-right. Zoom lenses are convenient for travel, but don’t let the zoom replace a short walk.
Landscape Composition is more “Right-brain” so its enemies are “struggling with technology”, “mathematics”. Therefore it is important to learn and practice your camera settings, tripod mechanics, lens characteristics etc before you are faced with important scenes. So you can then use your powerful camera as easily as using an iphone – when you need it.
Exposure in Landscape Photography
Do you think composition is important? Exposure is just as important.
Apart from cropping, sharpening and spot removal, most of what you do in post processing will be exposure related. In post processing, noise is introduced if you increase levels. If you expose well (without clipping)so that you are mostly reducing levels in post-processing, you will have a better quality result.
The histogram is the digital tool for exposure control. This should be checked with every new scene to see that all the information is within the histogram boundaries. If there is a build up of information at either end of the histogram, you will have area of the image that you cannot process, i.e. they have to be black or white (clipping).
Landscape Photography Focus
Composition and exposure are really important, but images can be cropped and levels adjusted. Focus can’t be changed afterwards at all!! But don’t panic, in 95% of cases it is difficult to mess up Landscape focus.
There are some technologies that allow you to focus after the photo has been taken, but in most cases, if you mess up the focus, you are left with a picture that is only fit for Facebook or Instagram.
There is only one “focal point” in any image, i.e. 1.45 meters or 2.67 meters, but we control the area that looks in focus with the aperture of the lens – this area is called Depth of Field (DOF). Wide angle lenses with a small aperture will have a huge depth of field.
With most landscape images you will have a satifactory image by focusing a 3rd into the scene with say f/14. DOF is 2/3rds after the focal point and 1/3rd before. To get technical you could focus at the hyper-focal distance. This inloves understanding your lens focal length and aperture (because both determine DOF).
Composing a Landscape Photograph
The most widely understood rule of composition is also the most widely used – the rule of thirds. Simply put, you divide your image into thirds both horizontally and vertically and the lines and in particularly the intersections are the points where points of interest in an image should fall. A basic example would be to place the horizon on one of the horizontal divides any objects, such as people or rocks or flowers should fall on one of the vertical divides. Some cameras allow you to display the thirds grid on their screen or eyepieces as this is such a widely used guide. This can not only help with composition but can also help with getting your image perfectly straight.
Fibonacci Ratio
The Golden Ratio, or fibonacci curve is a more advanced composition tool than the rule of thirds. The rule of thirds is man made, the golden ratio runs throughout nature. The rule of thirds is fashionable, the golden ratio is timeless. It is good to more onto the concept of the golden ratio as soon as you have shot some meaningful shots with the rule of thirds.
Rule of Thirds
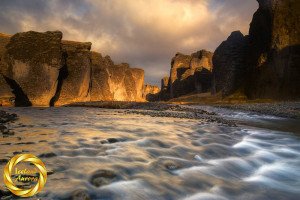
Óxárafoss Waterfall at Þingvellir National Park Iceland
To get this composition, I waded up to my waist into the icy water. Sometime you have to go the extra mile to get the more extra-ordinary pictures. Look at the picture above and think about what your eye is doing as it moves around the image…. can you track your eye’s movement? does it stop anywhere?

Lets look at the picture again with the thirds grid over the top.
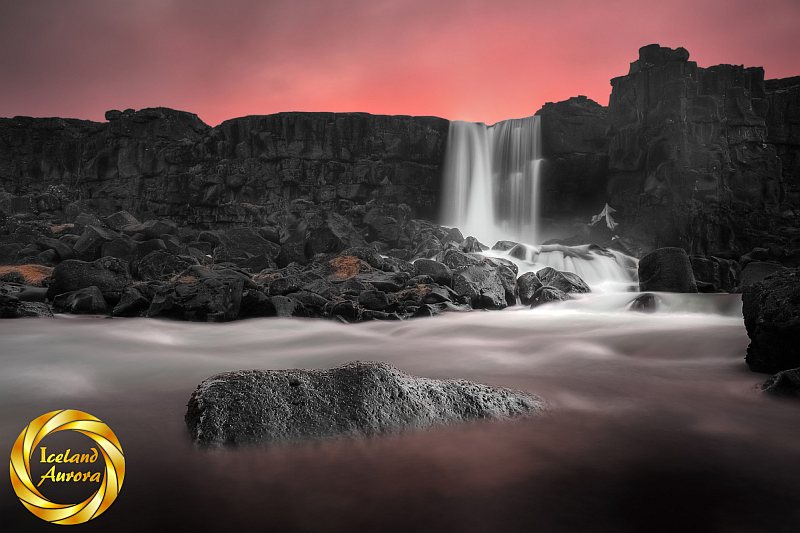
With the thirds grid over the image, you can see where certain objects fall in the scene and allow the eye to follow them in a natural way. The image conforms to the rule of thirds, but I didn’t really compose it with a thirds grid. I had the camera in a position where the proportions felt right and the height allowed separation between certain important elements of the scene.
The submerged rock dominates the foreground and the wonderful volcanic textures hold the eye, so I got close enough to be able to touch it when I was taking the shot. Hopefully you feel like you can touch it also. Hopefully you will feel that the waterfall is out of arms reach. The foreground is powerful way to communicate depth. Getting this close to the foreground ensures that it dominates the bottom third without crowding the whole scene.
Dynjandi Falls
This photo follows the same Landscape photography principle as the Óxárafoss Waterfall photo. I wasn’t wading in the river, but I had to work very low to the ground to bring the rock and the waterfall together. There was also a lot of spray from the waterfall, so preparation, other skills and experience come in to play.
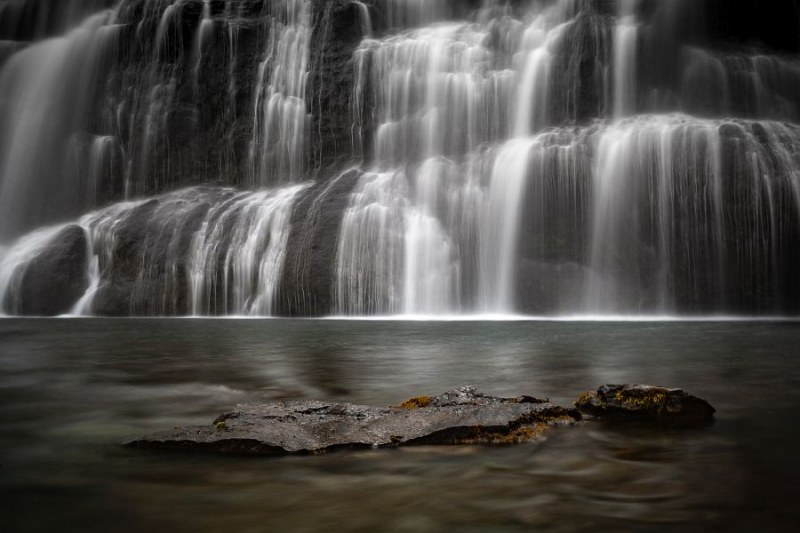
I wasn’t close enough to touch the rock, but close enough to capture some important textures. This is one of the most important reasons for getting intimate with your foregrounds. But the most important thing is that I have produced an original image of Dynjandi waterfall. Every photographer who visits will have that great cascade of water in most of their shots. What makes them original is finding a new perspective or context. Using foregrounds is a great way to personalise your landscapes and create something original.
Landscape Photography Exposure
Getting the balance between the sky and the land is an age old problem in landscape photography. The landscape is important to expose correctly because it contains information such as lines and textures. The problem is that is you expose the landscape correctly, the sky becomes over-exposed or washed out. The sky might have been as beautiful or important at the landscape, so it is useful to learn how to overcome it.
- Filters – polarisers and red filters can help if the sky is blue
- Graduated filters these are dark at the top and light at the bottom
- HDR – take bracketed exposures for computer processing
- Lightroom and photoshop – sometimes you can fix badly exposed images
- Magic Cloth Technique – apply a cloth of card during a long exposure
Exposure balanced with a Magic Cloth
Here are some landscape photography tools and how to use them.
Camera Gear
Camera – any camera will do, but best if you can control the aperture, exposure etc. Best if you can change lenses, so you can use fixed and zoom lenses. pro-landscapers use full-frame cameras to get the best out of wide-angle lenses. Modern DSLRs have live views which can help with composition, focus and exposure.
Lens – the best way to learn landscape is to practice with prime lenses. These are lenses that are fixed focal length and so don’t zoom in and out. 50mm is very cheap and you will lern a lot, but recommended for landscape are 17mm, 24mm, 35mm primes.
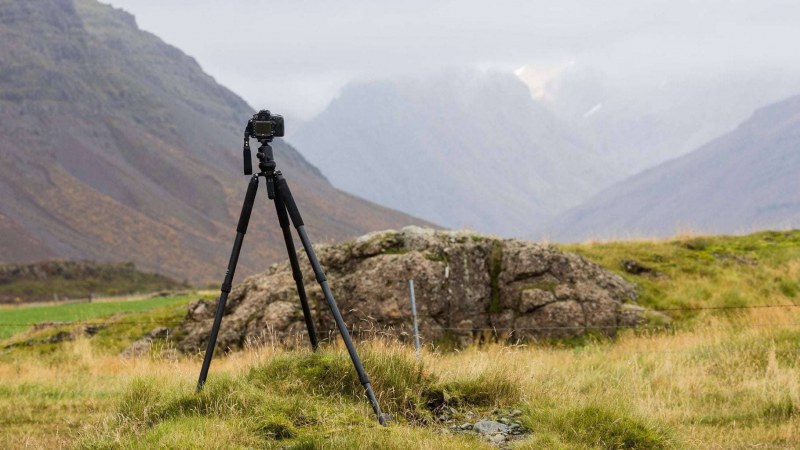
Tripod – not necessary for beginner landscape but as you advance you might find yourself with low light and needing small apertures. When you are well practiced, the tripod helps with composition, DOF and exposure.
Recommended Camera Gear
Canon 5D – full frame |
Canon EF 24mm f/1.4 l |
Canon EF 135mm f/2L USM |
Conclusion
In conclusion, landscape photography is a great way to escape your worries and improve your photo-taking skills. With the right equipment and techniques, you can create beautiful images that capture the beauty of nature. Whether you’re a beginner or a top-notch photographer, landscape photography offers unlimited possibilities and challenges. So grab your camera and start exploring! Practice makes perfect, so make sure to get out into nature and start taking photos! With patience and creativity, you will become an expert in landscape photography.